Saturday, December 27, 2008

puppy christmas

The dogs each got a squeeky chew toy from Aunt Patty, and in true Ella fashion, she spent the better part of the evening ripping the polyester out of the snowman to get to the squeeker, then destroyed that and went back to the "carcass". She'll carry that around forever, now that it's cleaned out. She greets me every day when I come home with one of her toys, always has.
Louie on the other hand, has always played nice with his toys, until Ella gets ahold of those too, and destroys them. He's more of a paper shredder, and this made him very happy.
In the end, my living room looked like it had snowed, and I had one very tired puppy!


Friday, December 26, 2008

merry christmas


well I hope everyone had a Merry Christmas, and now we're on to a Happy New Year as well.

My wish for everyone is a healthy, happy 2009 with plenty of time to stamp and create!

Wednesday, December 24, 2008

pinwheels


I went to Sandy Hancock's blog, http://www.sandystamper.com/ and learned how to make this easy pinwheel! Now I'm hooked. I hadn't made one before so I punched the pieces and sat in front of her tutorial to make sure I got it right, and voila! How cute are these? I think they'd be great any time of the year for birthdays, and right now, they take on a snowflake look. Maybe it's just that the house is so cold everything feels like snow!

All you need is 8 large tag punches and a 1 3/8" circle to adhere them to. I added the dimensional with glitter to the center instead of a smaller circle punch that Sandy had used. Follow her directions in folding, and it comes together super fast. I made a couple of others as gift bag decorations, and I'll show you those in the next couple of days, along with what was in the gift bag! Stay tuned...

Tuesday, December 23, 2008

where has the time gone?

this has been a busy week, and I just realized I haven't shared anything, so I thought I'd show you one of my Christmas cards that I made. I kept it simple since time is always short at this time of the year. I used Stampin' Up's jumbo wheel Snow with white craft ink, the Sizzix snowflake die, and Not Quite Navy and Confetti White cardstock.
For the center of the snowflake, to give it a little festive touch, I used a dimensional dipped in Dazzling Diamonds!
For the inside, I used the Bold Snowflake jumbo wheel, our new 1 3/4" circle punch cut into a spiral, and added the Sizzlits snowflakes. I used the Punches Three hostess set for the sentiment.

Tuesday, December 16, 2008

skinny tins, part 1


I was playing around with the skinny tins, and found that they look great when you stamp them with Craft ink and emboss them with clear embossing powder. I used the Bella Toile background stamp, and Garden Green and Chocolate Chip Craft ink on these 2 tins. Be very careful if you try this, the tins get SUPER hot when you heat the embossing powder. I found it was best just to hold it by the bottom part and let the top hang while I was heating it, then set it down to cool for a couple of minutes. I think I need to play around with this using different colored Craft Stampin' Spots and some different stamps. good thing I bought a few while they still have them. Stay tuned to see what I did with these!

Sunday, December 14, 2008

fast, easy & inexpensive

what could be better. These took no time at all, and I think they'll make great little gifts. I made a bunch of these with Stampin' Up! Holiday Treasures and Ski Slope DSP, and took them down to my sister. Then I realized I needed something for my co-workers, so I used more of the papers from Patty's 6x6 DSP split! Those are really coming in handy, and they are a great size for making almost anything! I got my paper pads at Staples, and they are 5" across, so I cut a 2" x 5" strip to adhere across the top, and attached it with Sticky Strip. I put one sticky strip on the front of the pad, then put the other on the paper, so I could line it up on the pad, crease the paper around the top, then release the other, once I had it all perfect.
For the pen, I used a strip of DSP that was 3 1/4" x 1", rolled it around a skewer, then put in in the barrel of the pen.
I love these pens, they're the only ones I've found that unscrew at the bottom so you can insert paper.
You can make 2 sets with one 6x6 piece of paper, plus an extra pen if you want! Pretty efficient, I think.

Saturday, December 13, 2008

my view from the craft room


I took this from the front porch, but I can see it from the craft room and the office. My sister Ellen & I give my mom credit for beautiful sunsets, and this one was gorgeous!

Friday, December 12, 2008

coaster calendars

I saw these calendars on Connie Babbert's blog, www.inkspiredtreasures.com and wanted to make some while my sister was here, so she could take them home and offer them in her gift boutique at her store, All of Me, in Clovis, CA. We used papers from a 6x6 DSP split that Patty Bennett offered back when the Fall/Winter catalog came out. Since I'm assuming we'll have all new papers in the Spring/Summer 2009 catalog, we decided this would be perfect.
We couldn't get the clips to stand upright, like Connie's did (maybe our clips were smaller?), so we clipped them at the bottom and used the clip like a stand.

Since Ellen had to take these home on the train, we left everything flat, and stored the clips back in their original boxes.

We used 4" square chipboard coasters, cut the paper to fit and used one of SU!'s retired corner rounders which fit the edges perfectly, then adhered the paper with the Stampin Up! Anywhere Glue Stick. We used calendars that Connie recommended at www.skybluepink.com, and attached them with snail. We used a 1 1/4" x 2" strip of the same DSP, and attached it to the binder clip with Sticky Strip. We added a couple of ribbons to give it a little dimension, and helped use up some retired product (I sure hope they bring organdy ribbon back, small and large widths). Once we took our pictures, we labeled the boxes so that Ellen wouldn't have to take the time to match everything up, once she got them to the store. I just loved how the clips looked all lined up!

We had a fun time working together in the newly organized (but still a work in progress) craft room, and they didn't take too long to put together. We made 50 altogether, and I kept one so I'd have something on my desk to take the place of the one we made in Patty's class last year!

Tuesday, December 9, 2008

snail


I must say, I LOVE snail adhesive! Whenever I have "free money" from orders, and don't have anything in particular that I want, I stock up on snail, adding a few here and there. While I was working on my craft room in my spare time these past few weeks, I finally corralled the majority of it into one bin. I think it looks like I can hold off on any more snail orders for a little while. But doesn't it look great???


Sunday, December 7, 2008

post it holders


I can't remember whose site I saw this idea on, but they were so cute, I wanted to make some. They start with a 4x6 acrylic frame, I added DSP and the tree or snowflake, then added some sticky strip to the back of the post-it pad and adhered it to the front of the frame. The holiday post-its were at Target in the dollar spot. I'm going to add a ribbon through the top of the frame and tie a pen to it, just haven't gotten to it yet.

Saturday, December 6, 2008

simple sizzlit card


I love the sizzlit snowflakes, I even have a votive holder full of them just waiting for some inspiration. This simple card uses some of the self adhesive die cuts from the Simply Scrappin' I Wish Kit. I used a 5 1/2" by 8 1/2" sheet of whisper white cardstock, folded in half, then cut off an inch from one side and added snowflakes with mini glue dots. I used one of the "ribbons" from the die cuts to show off the snowflake shapes and added the holly. I added one of the sayings on the inside. Super fast and easy!

Friday, December 5, 2008

leftover scallops


I had a bunch of scallops in the Holiday Treasures DSP after I made all of the trees out of the pennant die, and a bunch of shimmery white scallops from the scallop punch (I don't remember why I had all of those), so I made a few ornaments, layering the two sizes of scallops. This ornament uses 6 layered scallops snailed together, then the circle is completed with a hat pin from the Pretties Kit in the middle with a bead from the kit as well. I used the gorgeous kiwi kiss/very vanilla satin ribbon to top it off. Simple but sweet!

Thursday, December 4, 2008

bone folder

I brought this as a "share" to our Luv2Stamp group meeting, and to a class, and Patty urged me to post this at some point, so here goes. What do you get when you give your English Mastiff access to your craft room and supplies?

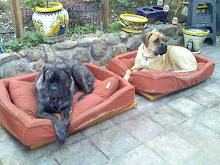
Now in his defense, it IS called a "bone" folder! I must say, when I bring this to a meeting, no one ever says "I think you have my bone folder". It's an original. Thankfully he didn't eat the tip, and I actually have used it on occasion. I did break down and buy more, so this one can retire, and just give us a laugh from time to time. The culprit:


Wednesday, December 3, 2008

snowflake tins

It's been bugging me that I've had these round tins sitting around for awhile, so I added some small candies, then sealed them with Scotch brand double sided tape (it's very forgiving, and you can even peel it back and realign if you need to) and Stampin' Up! DSP.


I added a Sizzlits snowflake and a DSP snow flower punch to the top, and added a little bling to the center.


They came together really fast, and I think they're pretty cute, especially all stacked up together.

Tuesday, December 2, 2008

deconstructed scallops


I took another picture to show what I described in the previous post. Hope it helps.

scallop trees


I've seen so many cute scallop punch ideas, and just loved this tree as well. I used the Stampin' Up! Holiday Treasures DSP for the tree and Chocolate Chip cardstock for the trunk (with the word window punch). I stacked all the scallops up and poked a hole in the center, then cut from the end of one scallop to the center, counted 5 scallops and cut to the center again. This makes the bottom layer of the tree. Counting out 4 scallops and cutting again, then 3, and stacking each diminishing layer, leaves you with 2 for the top. I added the "trunk" and voila, a cute little tree! I'm going to be using these to make some post it note holders that I saw somewhere else (if it's you, let me know and I'll add your credits). I'll post those when I get them made. I'm taking these down to my sister in Clovis, CA this coming weekend for her gift boutique in her store, All of Me.

Monday, December 1, 2008

owls

Owls have become really popular again, I say again, because 42 years ago, my mom was really in to owls. Well maybe she wasn't, but she showed interest in owls, and suddenly she had a collection. She had beautifully carved owls in stone and wood, metal and plaster castings, and this. When I was 6, I made this pathetic owl in school for her. It consists of 2 styrofoam balls wrapped in tin foil and a few felt pieces stuck on with straight pins. It has a sash across its chest and 2 sad little ribbon wings stuck on with pins in the back. To add insult to injury, it has a white pipe cleaner jammed in its head. Now the cool thing about it is that my mom LOVED this sad little creature enough to save it from year to year and put it on her Christmas tree. As I got older, I was able to hide it discretely in the center or back of the tree and threatened to toss it out regularly, but after the holidays she still carefully wrapped it in tissue like she did with all the "real" ornaments, then proudly displayed it the following year. It came into my possession a few years back, and although the years of threats to destroy it beckoned me to do just that, the reminder of how much my mother loved it won't allow me to do so. It hangs year round in my walk in closet, and I smile at its charm, innocence, and sad little face daily.


Now, my sister, Ellen McCarthy, http://www.stampinwithellen.blogspot.com/, made this beautiful owl and the breakdown of how she completed it, all with Stampin' Up! punches. She's super talented, and I think it's one of the prettiest owls I've seen.


Saturday, November 29, 2008

riot of petals


I love this background stamp, Riot of Petals, currently on the dormant list, and had an idea of making butterflies (from the Priceless set) out of vellum and adding them to the flowers. I stamped the butterflies in Glorious Green, then embossed them with clear embossing powder, cut them out and bent their wings, leaving enough space on their bodies for a mini glue dot. As an after thought, I decided to cut a 4 1/4" x 5 1/2" sheet of cardstock vellum, and layer it over half the card.

Friday, November 28, 2008

crystal effects, dazzling diamonds and reinkers


I'm working on a new swap and made these cute little flowers for part of the card. I used Very Vanilla cardstock, the trio flower punch and, here's what's really cool - crystal effects, dazzling diamonds, and riding hood red reinker all together. I took a small squeeze bottle and added about 1/2 bottle of crystal effects, 1/2 jar of dazzling diamonds, and 7 drops of riding hood red reinker. I then spent a good amount of time shaking the bottle to mix everything together, but it turned out well. I've done this with a few other colors too, and really light colors, like pink pirouette, require more than 7 drops. I haven't had any problems over time with them drying out, but they do need to be shaken pretty vigorously to get the glitter back in to the mix, but oddly enough, all that shaking hasn't produced air bubbles. Give it a try!!!

Thursday, November 27, 2008

chrysanthemum twist


I have seen this gorgeous chrysanthemum on several blogs, and have even attempted it once before, shading each layer, and it turned out nicely. I decided I wanted to try it with printed paper from the level 1 hostess DSP Patterns Pack in Real Red. I layered it the same (following a picture I saved from http://www.crazystampgirl.com/) but this time changed the center using the snow flower punch and More Mustard from the same hostess pack, to make it a little like a poinsettia. I added a red rhinestone brad and leaves free handed from scraps of Holiday Treasures DSP, then backed the sentiment (also a level 1 hostess set - Best Yet) with 2 extra punches in Real Red from the curly label punch (one cut in half, the other turned sideways). I added dimensionals to the center of the flower, all the leaves, and the sentiment just to make it pop a little off the card.

Thursday, November 20, 2008

punch wall update

I think I finally have all the current punches up (including the new hearts - yay), and that leaves me with no room for the retired shape punches (remember the balloon, the safety pin, etc... I miss those), so they will remain in a couple of clear shoe boxes from the Container Store.
I did use the Stampin' Up! white bulk vinyl to punch out the shapes of everything that seemed practical, and put that behind each punch. I didn't use the second sheet that comes with the vinyl, I found that after punching the white vinyl, it sticks to the wall just fine for what I was doing.I think it turned out nicely, and I've actually had a chance to work in that area, punch something, and put the punch right back on the wall! Whoever thought of using the rods for punches was a genius!!! IKEA also had a paper towel holder and some cups (for Sharpie's & scissors) and clips that I can use too. They're the best.

Sunday, November 16, 2008

journal tree

ok, going back to our Luv2Stamp group meeting, and my Christmas presentation (maybe for the last time, we'll see) this turned out to be one of my favorite projects, and was another really fast and easy one (feel free to share it with all your friends and family). I used ten sheets of Stampin' Up! cardstock, in kraft (2), real red (4), old olive (2) and certainly celery (2). I cut the cardstock in half, so it was 8 1/2" x 5 1/2", then laid it on the Pennant die so it would be cut from the point of the scallop edge (the "top" of the tree), just to the score line (this allowed the tree to stand flat, and also happened to be nearly a perfect fit for the cut cardstock). These are meant to be half sheets, not folded, so where you'd normally have a fold, it's the long cut side (8 1/2"). Once they were all cut (20 half sheets total), I bound them together in the Bind It All, then started to embellish. I did very little decorating, I added a few pictures (yes, my dogs);


a few decorations (filigree brads and rhinestone brad centers);


but mostly, I thought this would be a nice journal of Christmas memories;


so I spent some time thinking back to some of my most memorable Christmases and writing down those thoughts. I thought this would be a nice decoration that could be folded flat for storage from year to year, but then set out with other decorations, and the writing itself added to the decoration of the tree. Using a silver or gold pen really makes it shine, and memories added yearly make it a very special tree. Over the years, you could build a forest!

Friday, November 14, 2008

faux silk


these cards are from the Oakland Regional earlier this year, but I wanted to try my hand at faux silk after attending one of Patty Bennett's classes. I also wanted to make some really cool card candy, so I made 4 different embellishments, using a bunch o' punches! Having to make so many cards, I found it was easiest for me to stamp the Baroque Motifs swirl on the tissue, then apply it to an entire sheet of cardstock with our SU! Anywhere Glue Stick. When it was dry, I cut the cardstock down to individual card size, and made each card from there. Super fast and easy! There are a few retired items in these cards, the ribbon (which I love, and would love to have back) and the soft sky cardstock, which was one of my favorites (did I ever tell you I have a hard time letting go?).

Thursday, November 13, 2008

wall o' punches


I'm sorry for not posting much (or anything) for more than a week, but I'm in the process of reorganizing my craft room and it's taking a lot more time than I'd thought. I really like the rods being used for our punches, so I went to IKEA and bought the 31 1/2" Grundtal rods and just got those up! I'm in the process of finding all my punches to put on the rods, but was thrilled at how it looks so far, and really happy that even our smallest punches sit securely. I'm including a photo of what I've got so far, and I was thinking I'd like to punch our Stampin Up! vinyl and apply that to the wall, so that if a punch goes missing, I'll know which one it is, and that if I pull a bunch down to use at one time (which happens frequently), I'll be able to put them all back where they belong (isn't that what our mother's taught us, "a place for everything, and everything in its place - yeah right!). ok, how many people noticed that the spacing is exact, and the width is the same as the height (I'm not obsessed, right?).

spot on update


I don't know if you'll remember, but when I posted my decor elements spot on photo, I had said I'd like a few more spots, so I decided to add a few of the bulk buy decor elements flowers! Since it's in my office area, using the rose and the chocolate together added a nice touch (meaning that if it were for a boys room, you might want to stay away from the rose, but maybe not). I've added the updated photo so you can tell me what you think!!!

Tuesday, November 4, 2008

fall swap


I was recently involved in a holiday mini swap and used the Stampin' Up! Happy Blessings set. I started with watercolor paper and black StazOn, then used reinkers and the aquapainter. Initially I was very "tidy", then decided to add some more water and go over the whole thing. I think it looks a little more old and worn, and that's kind of what I was going for. Next I added craft ink with daubers to the vanilla hodgepodge in pumpkin pie, old olive and creamy caramel , and sealed it with clear embossing powder. I used bleach (one of my favorites, now that I know how to do it), then pumpkin pie classic ink on the background. Finally, I added crystal effects to the pumpkins and the center of the flower, and popped the pumpkins with dimensionals. This sample doesn't show it, but I also added the ticket corner punch to the edges of the background and the watercolor to tie together with the hodgepodge frame.