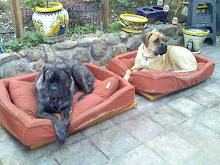
Boy oh boy, did he get BIG!!!
Sunday, November 2, 2008
happy birthday louie!
Today is Louie's 5th birthday (he's on the left), so in order to somehow make it "stamping related", I made a card using the Stampin Up Party Hearty set. Let's face it, he's 182 pounds of dog, has little interest in cardstock (unless it means he can chew it up), and would much prefer the "cake" I'm making for him. I made the same cake when Ella (on the right) turned 5, saw it on Martha Stewart, and thought it was the greatest idea. I made 2 meatloafs in round cake tins, then "frosted" between the layers and all over it with mashed potatoes! Now Martha went ahead and decorated it with peas and carrots, but come on, they won't notice, and it smells so good, they just want me to cut into it! I should have made it with other "dog diet" things like bone meal and sea kelp, but I love meatloaf too, so we're sharing it! So, back to the card, as I said before, I used the Party Hearty set (I LOVE that set), confetti white CS, Green Tea DSP, the new clips assortment (love, love, love), and kiwi kiss/very vanilla satin ribbon. I thought it a nice combination for a "boy" card.
Friday, October 31, 2008
Saturday, October 25, 2008
carousel note cards
The card on the left is the lower layer, the card on the right is the finished one. I wanted to use the carousel note cards in a different way, so I cut each one down to 10 scallops so it would fit on a 4 1/4" x 5 1/2" card. From one carousel note card, I was able to get 2 pieces, plus 2 extra center sections (each one looks like a tongue depressor in the photo). I cut the other section in half, and by doing this with all three colors, I was able to mix them up and use all of them on this card. I used the scallop edge punch on the folded black card and on the "tongue depressor" left over piece, and offset it under the black card for a great effect. You could also line it up a little higher exactly in line with the black scallops, but I liked how this looked. I used the So Swirly jumbo wheel in coordinating colors for a little pizzazz. I made the clock with the scallop circle #2 sizzix die and brushed silver cardstock, the Calendar Alphabet & Numbers stamp set, Party Hearty stamp set, scallop punch, my way punch, filigree brad and rhinestone brad. I also stamped "Happy New Year" in silver from the Holidays & Wishes stamp set. If I don't get all my Christmas cards done in time, I think I'll use this card for my lateness!
Friday, October 24, 2008
open end envelope album
When I first made this album, I used bright summery paper, and I'm amazed how well it adapts to any paper or Stampin' Up! simply scrappin kits (my favorite since there are so many self adhesive die cuts to embellish any project). Of course, this is another one of my Christmas presentation projects, and of course I used the I Wish simply scrappin kit. Have I said how much I love this kit? I used the Stampin' Up! open end envelopes and the bind it all to put it all together, along with blank cardstock pages, and tabbed pages in the envelopes.
It's a fun and easy project. Another one to embellish the heck out of. In addition to what was in the kit, I used filigree brads, rhinestone brads, sizzlits snowflakes and several punches. Try it some time!


Wednesday, October 22, 2008
pennant die trees
To add to my pennant die tree collection, I decided to make a card as well. I used Stampin' Up Design Series Paper in Holiday Treasures, and used scraps that were about 1 1/2" x 2". To make it super easy, I folded and snailed the three scraps together (folded sides all lined up together), then lined them up on the small pennant from the tip of the scallop, to wherever I wanted the width of the tree to end. Once I rolled it through the Big Shot, I had a 3-d tree. I added the "peace" from the decorative strip die Join in the Cheer with a few dimensionals, and added rhinestones from the Pretties Kit at the tops of the trees. I used shimmery white and kiwi kiss paper for the base of the card.
decor elements spot on II
I decided to try my hand at the Stampin' Up! Decor Elements Spot On II, and I think it turned out pretty well. I could probably use a few extra spots, but it was pretty easy to install. I cut apart the dots, and circles of dots, and installed them separately. I didn't have to apply much pressure in rubbing the grid paper, more like a light once over rather than burnishing, and then when it was on the wall, I just rubbed over the whole thing again, and slowly peeled the cover paper off, rubbing a little extra with my finger if something wasn't quite sticking. I strategically put a couple of them over scratches or nail holes, but that's the beauty of a random pattern! All in all, I think it was a pretty fun and easy improvement on a blank wall. Now I'm looking at all my other walls with a different eye...
Subscribe to:
Posts (Atom)